create-node-cli: Build a Node.js CLI Quickly
One of the perks of being a Software Engineer is you can automate a lot of your grunt work with CLI automation tools. These tools can save tons of your hours on a monthly basis. But making these tools can be a bit of a hassle. And if you are planning to open-source them then you need to make sure that they are up-to-mark.
What if I tell you that you can create such CLIs in less than two minutes? This CLI will be production-ready with a beautiful header and proper help command.
Now I am going to walk you through each step of how you can build such CLIs.
→ Step #1
Make sure you have Node installed in your system. You can download & install the Node from here. If you are confused about which version to download & use then you should take a look at this watch this video.
You can skip this step if you have Node already installed.
→ Step #2
Now that you have Node installed on your computer, you can easily build a production-ready CLI. For that, open your terminal. Navigate to the directory in your terminal where you want to create the CLI & then type in the following command.
npx create-node-cli→ Step #3
Once you run the above command, you will see a couple of questions on your screen. Give your CLI a name, some description, version, run command, etc.
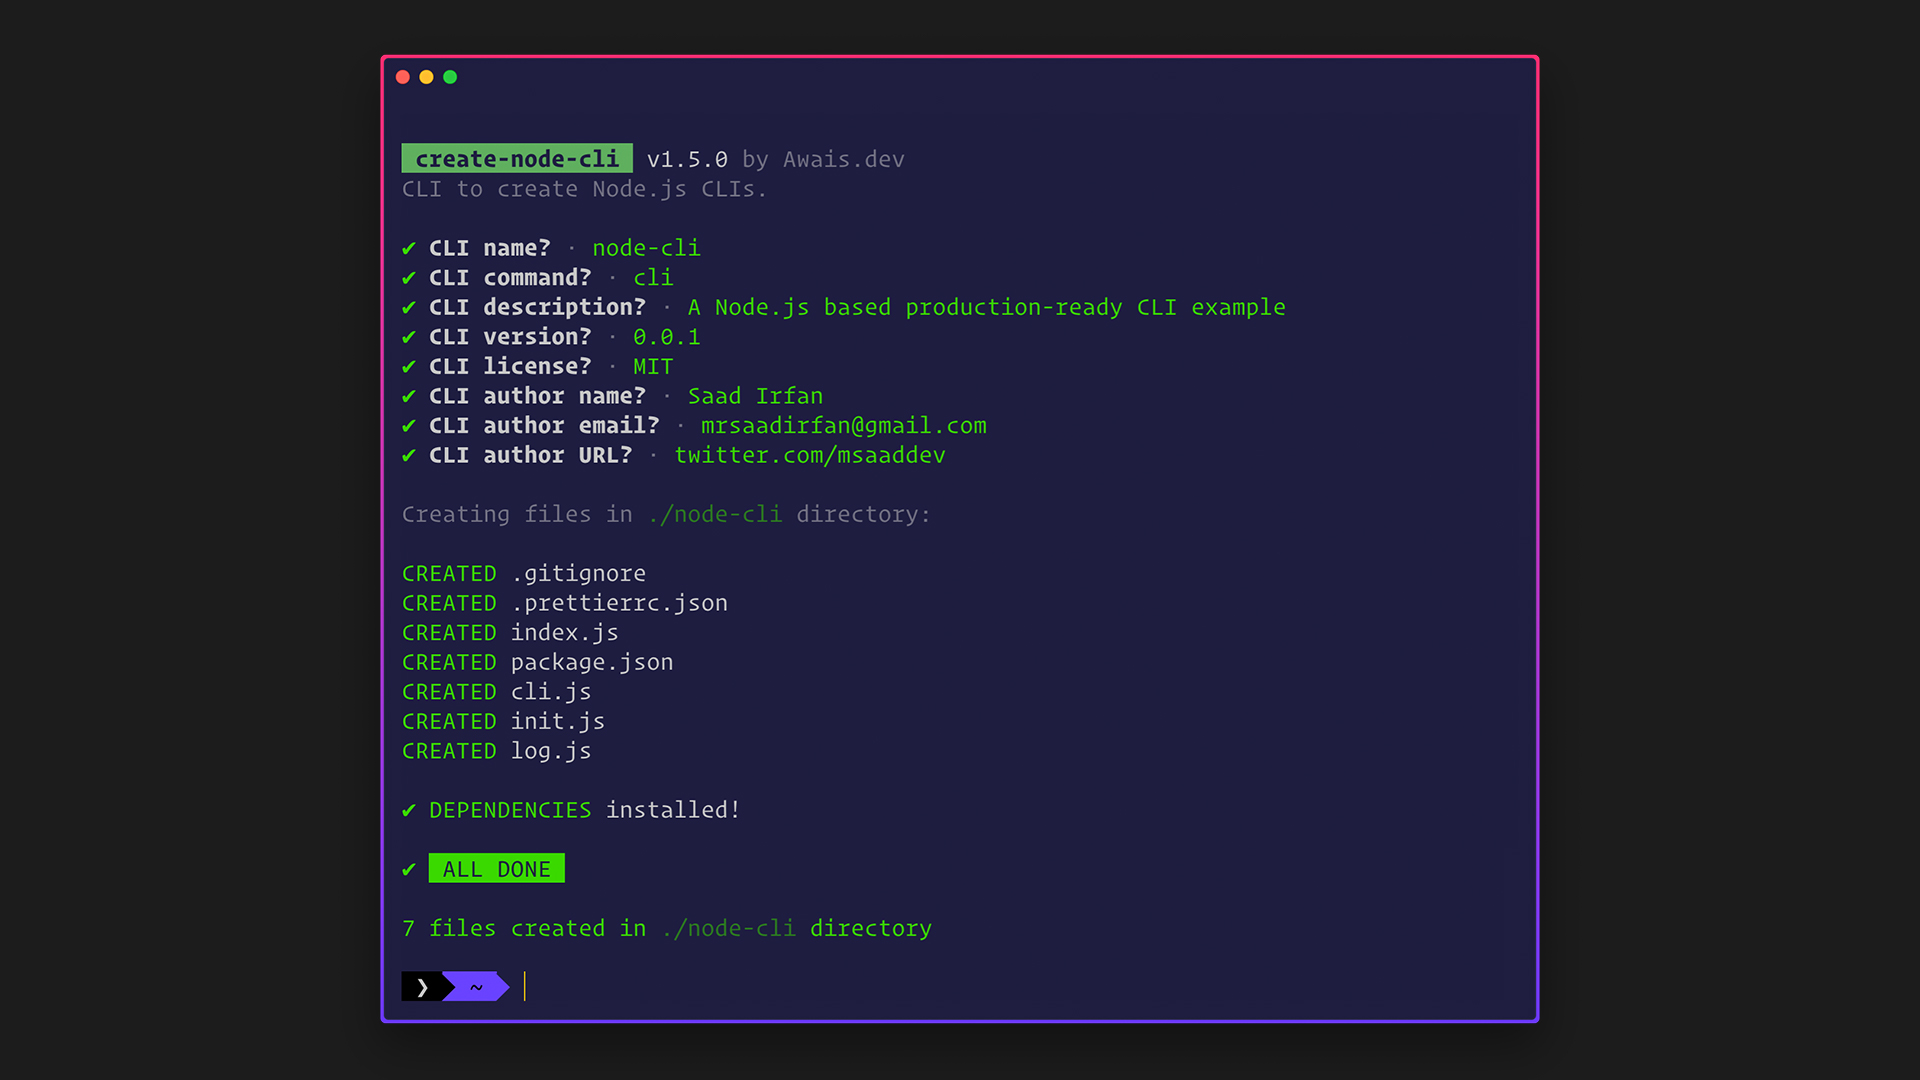
Once it's done, open your CLI directory in any code editor of your choice. For now, I am going with VSCode.
→ Step #4
Type in the following command in the terminal to locally link the CLI in your terminal.
npm linkNow you can run the CLI with the command you provided in step #3.
→ Step #5
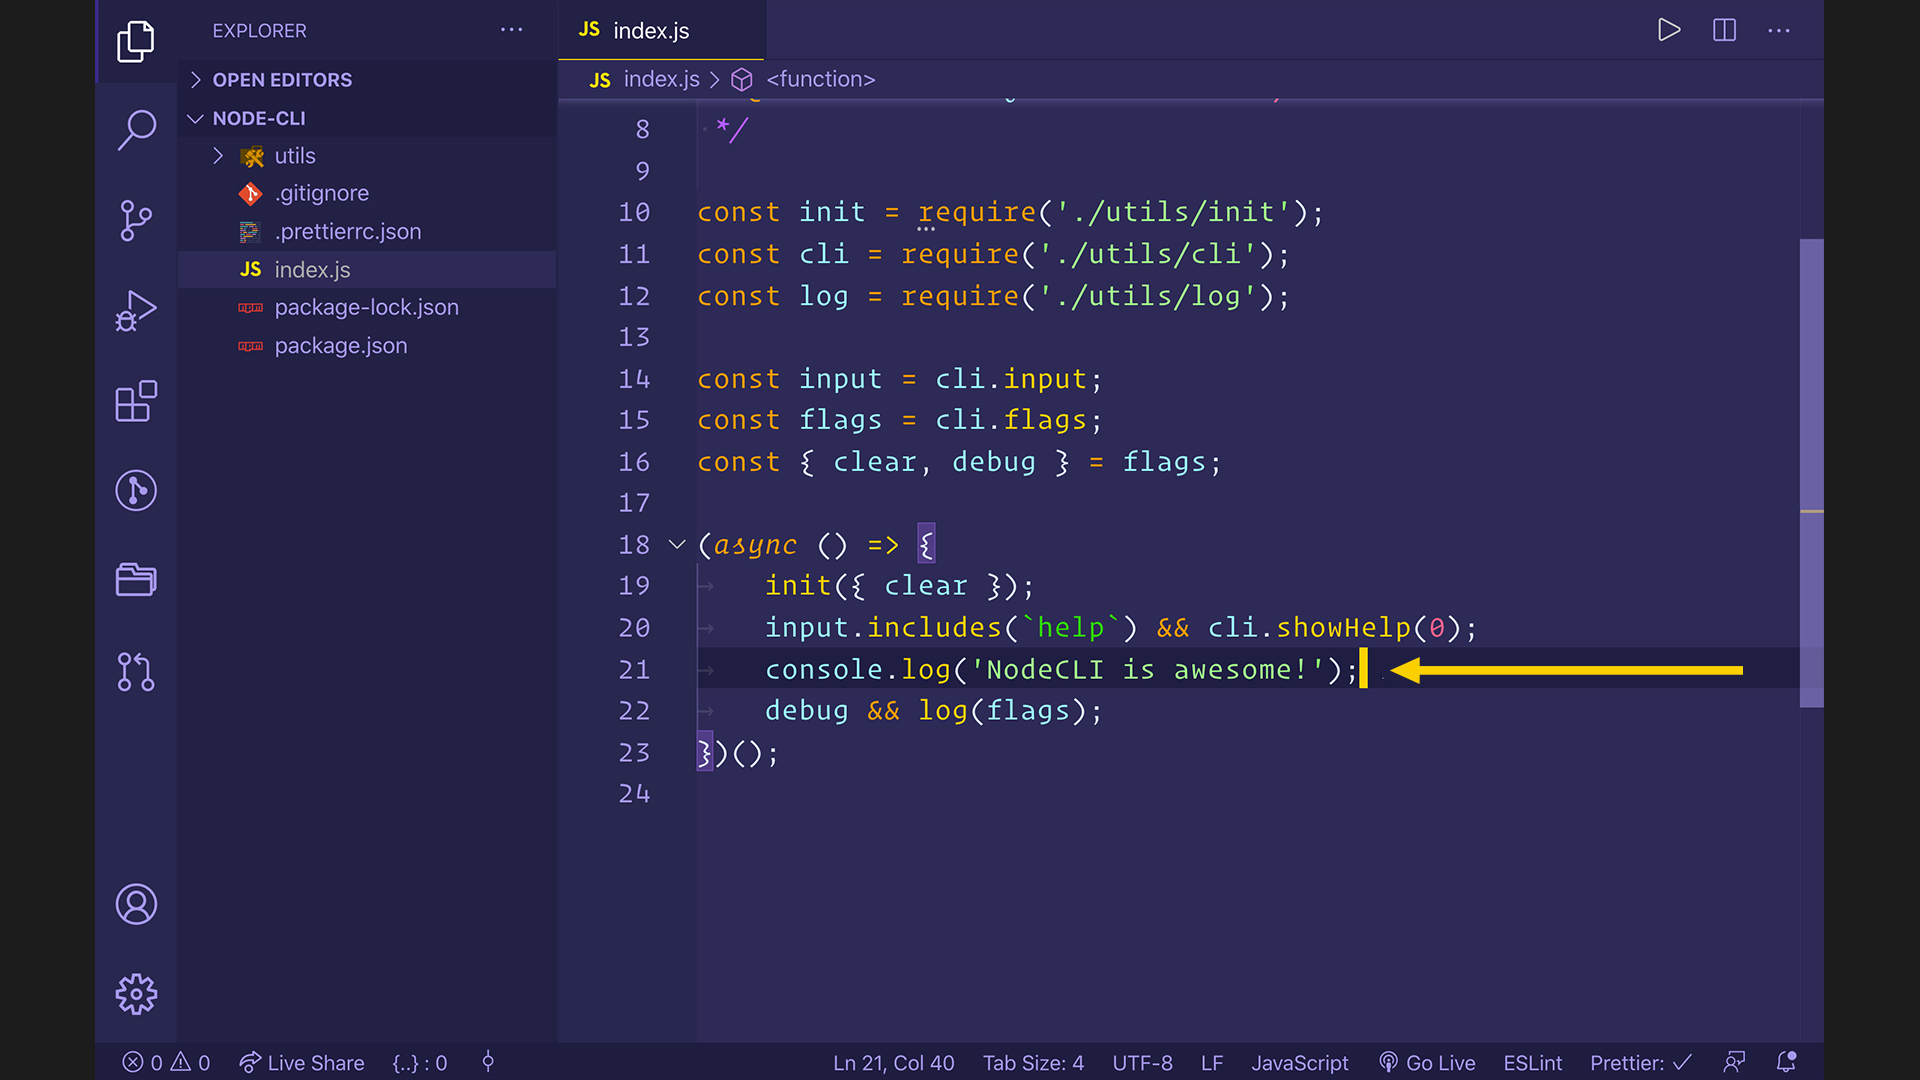
Now I am going to open the index.js file and add a console log in there.
I am going to open my terminal and type in cli and press Enter.
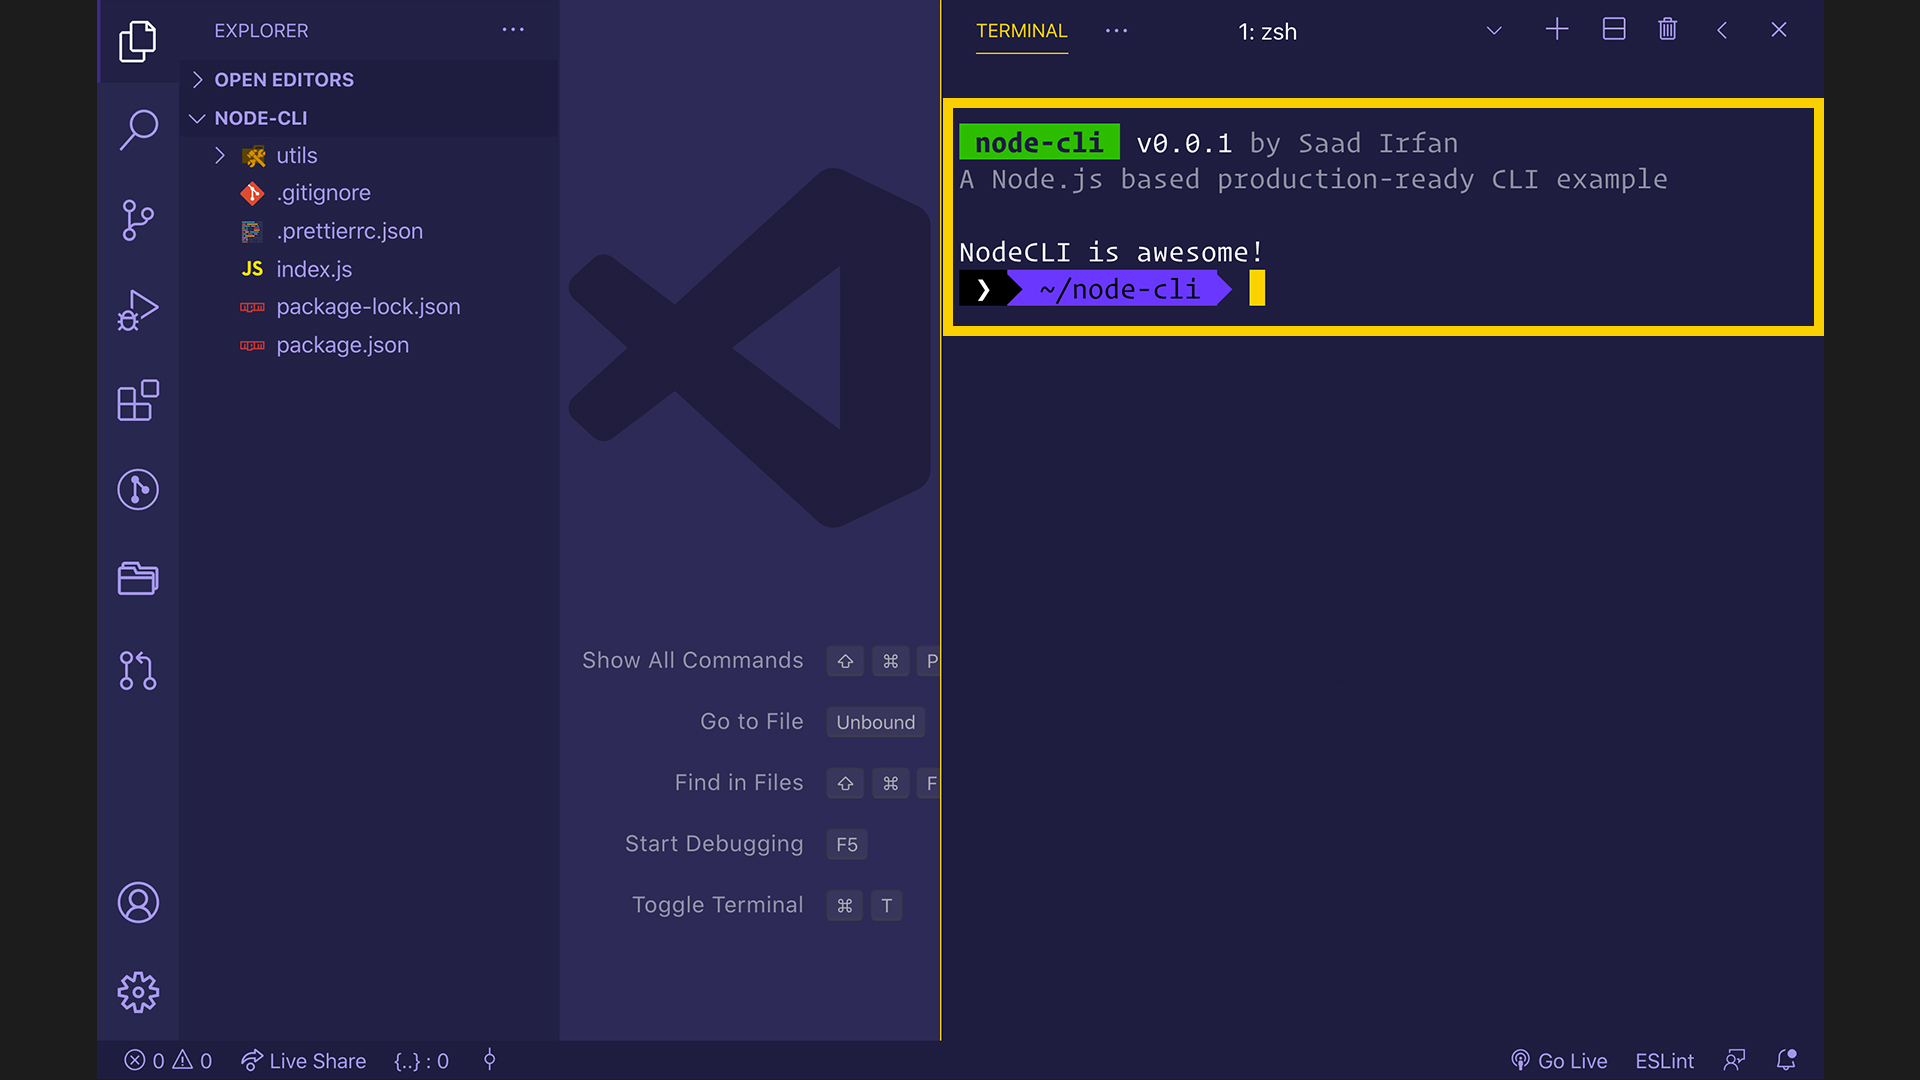
And there you have it, folks! You have a production-ready CLI ready in just under 2 mins.